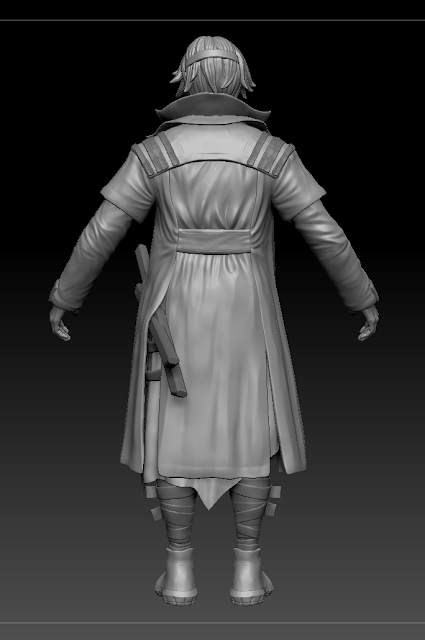
I got some feedback on the folds and I realised that I overworked it and I should tune it down in some areas and only keep more defined folds on the areas which would bend (around the armpits, elbows). Fortunately, I sculpted all the details on the coat on different layers and it wasn't that complicated to change it, I just took out some layers and softened others. I tried to find a balance and have enough resting space without giving up on all the sharper folds which would appear on a leather jacket and after changing it, it started looking a little better and more realistic.
Even though I could spend another few days just working on the coat there are still areas of the characters which need to be finished so I had to move on, as I wanted to be finished with the sculpt in one week.
The next thing I worked on is the hair. I wanted to make a base hair mesh in Zbrush and the use hair cards to add more details to it and get the same fluffy feeling it has in the concept. Spent some time sculpting the hair strands on the base and positioning it in the right shape but I wanted to keep the silhouette fairly simple and not add too many hair locks.
After I got all the main things done, I started going over all of the parts again and fix everything to finish it off. Got more feedback and realised that the t-shirt was looking too symmetric and changed to go over the katanas, rather than be tucked under them, also softened the folds on the chest a bit more. Worked on the coat collar more and tried to make it more asymmetric, added some bands which were missing on the the sleeves. Changed the folds on the piece of cloth around his waist as well and tried to make less repetitive. Also, broke the symmetry of the wraps around his legs and refined the shape of the shoes a bit more. I changed the position of the belts a little to make it work better and added some studs that were missing and some pieces which would hold the kunais in place, I tried to make them look as you could detach them from one side, so it would be actually possible to use the kunais.
I worked on the face and hands a bit more. For the face, I tried to keep some sharp angles as I had seen on many characters from Sunset Overdrive. I also added some skin pores but I kept them very subtle to fit the style of the game. I did some more work on the hands, fixed their shape and added more details, veins and tendons.
I really tried making the character match the style of Sunset Overdrive and constantly looked at the characters in the game when sculpting. Also, I found some sculpts of the characters as well which were really useful to see how things are supposed to look.
At this point, I was fairly happy with how to sculpt was looking and decided it was time to move on if I want to finish everything in time. I didn't want to change anything affecting the silhouette anymore so I could start the low poly model, and if I had time after that I could come back and make small changes to the sculpt.
Manged to finish the sculpt in roughly 6 days of work.


No comments:
Post a Comment