Friday, 25 October 2019

SO Character - Sculpt 1

For the second project I have decided to do the Sunset Overdrive character and picked a concept made by snod snow on artstation (https://www.artstation.com/artwork/mqvA8a). I picked this concept becaue I think that it would fit in the Sunset Overdrive universe if I sculpt it in that art style, the character has a lot of features that I saw on actual characters from the game, like the mask, clothing style and even the samurai themed parts, the katanas and shoulder pads. 


My first goal was to block in the character as quickly as possible, I sculpted the main shapes of the body and tried to match the proportions with those on the concept. I didn't want to make the body sculpt very detailed, as most of it it's going to be covered by clothing anyway. Most of the pieces of his outfit I made directly in Zbrush, except for the coat which I modeled in 3dsMax first, as I wanted to have more control on the shape. The pieces done in Zbrush are a combination of using extract and zremesh ( e.g. the shirt, pants, legs wraps), adding basic shapes (for the mask) and using insert mesh brushes (doing plane strips for the belts and the bloby shapes for the hair).


At this point everything was looking very simple and undefined but I tried to focus on getting the silhouette right and the main forms before adding more details. It took me a little longer than I expected and a lot of going back and forth before I got something that I was ok with, I spent roughly 2 days working on the block in, trying to get things right. 
After I had the base, I slowly started to add more details to the sculpt and define the shapes better.
Also, went back to 3dsMax to make the props (the kunais on his belts and katanas), as I wanted to get them in as soon as possible to see how they would look and how to fit them within the outfit. 


I managed to get some details on almost everything, except for the coat and also add some bits that were missing from the legs wraps. The main thing that I am focusing on next is the coat and how to make it work with the katanas on the side, I am debating between sculpting the coat to be covering them or leave it as it is and rig it in the right position. 
Still got a lot of work to do but it's slowly taking shape.
That's the work I managed to get done in the first 3 days. 

Sunday, 20 October 2019

Helmeted Character - Presentation & hand-in

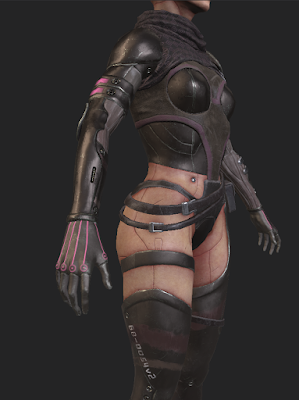
Thursday, last day before the hand-in that I would be able to work on the character because of the EGX trip on Friday. I spent the morning making the textures for the prop and plinth, I tried to keep them nice and simple since I didn't actually have the time for anything else. I had some trouble deciding what material to make for the plinth, initially I made some dirt, earthy material then changed it to some metallic, sci-fi floor tiles. I wasn't happy with how these two looked because I felt like it took the attention from the character, so I ended up doing just a flat colour with an alpha map, just something that would catch the shadows nicely. For the butterfly, I wanted to make its body metallic and its wings made of some semi translucent glass material and emissive.
Over the past couple of days I experimented a bit with hair cards, I hand painted the texture for them in Photoshop and spent some time placing them and trying to make them look nice. I managed to get her hair to look fairly decent but by the end I realised that I actually prefer her without hair, because I think that it adds more personality to the character and it is a nicer detail than just having hair. Unfortunately, I didn't have time to modify the UV sheet and remove the hair texture so I had to leave it as it is.
I spent the rest of the time trying to light the scene nicely in marmoset. I always find it difficult to set it in such a way that would compliment my character so I had to go through a lot of trials and feedback until I got something that looked decent.
At the end of the day, I had something that could be called finished to hand in. I am fairly happy with how the character turned out but there are still some areas that I would like to change and improve, so I am planning to go back and makes some changes after I get the formative feedback.


Helmeted Character - Pose & props

Wednesday, third week of the project, after I got my textures to a level of details that I was ok with I needed to take a break from looking at them and do other parts so I started rigging the character.
After I checked my low poly for any errors and reset the X form, I dragged in the biped, matched it with my character and started skinning. It was a slow and long process that took me the entire day and the following day for fixing. I don't find skinning particularly difficult but it takes me a lot of time to assign the weights properly and a lot of testing. I tried to keep it as simple as I could, especially because my character doesn't have any flowing, dangling parts. The most trouble I had with rigging her shoulder pad as I could not get it to move properly when she would raise her arm. I ended up adding another bone for it and tried to rig it to that, so I could move it individually. Also, had some troubles with rigging her belts so they would not get squished when she would move her legs, I got them to look decently but I might add another bone for them as well to control them a bit better.
I wanted to make some props as well, but because I didn't have enough time left for something big I just made something simple, I made a small robotic butterfly and a plinth.
Finally, I posed my character and the props and just exported it into Marmoset Toolbag to get a better look at it. I ended up changing the pose a few times, but I wanted to keep it fairly simple and natural.


Helmeted Character - Textures 2

Second day of working on textures, I started working on the other materials which had no definition to them. The most challenging I found to make the material for her arms, as I did not want them to be metallic and tried doing some kind of plastic/rubber material. I am not completely happy with how it turned out but I tried adding some surface details and wear to it. Also, added a color gradient on her arms and legs to make it look a little more interesting.
I worked some more on the level of wear in all materials, trying to make it consistent. Also, I added some stencils on the metal and skin, and added emissive details on certain areas, like the shoulder pad, spine armor, hands, helmet, to make them stand out better and break the consistency of unsaturated colours that I had in all the materials.


Also, worked a little more on the skin and added some more redness where the panels connect and where it touches the armor. Added some sharpening filters to get nicer details, some dirt layers applied consistently on her outfit and some AO layers to reinforce the transition between the different parts of her outfit.


At this point, I am fairly happy with how the textures turned out and I only need to work on the details a bit more. This is what I managed to get done after 2 days of working on the textures.
I am planning to work on the textures more after I make my final lighting set up in Marmoset Toolbag, so I can get a better view on them.


Tuesday, 15 October 2019

Helmeted Character - Textures 1

On Monday, third week of the project, I started the textures. Firstly, I created groups for all the different materials that I had and masked them using the ID map that I previously made in 3dsMax with vertex paint. Then I laid out a base for all of them to see how they would all look together and get the colours and roughness right. This took some trial and errors until I got something I was ok with, as the concept I am using is not very clear on the materials properties.
After I defined the base of the materials I started adding details to them. The first thing I worked on was the skin. I added multiple layers to get the mottling effect, as well as skin spots, subtle freckles and redness. My idea of the character was to make her fully robotic, so the skin would be fake as well but at this point it was looking fairly realistic and it was hard to tell that the character is entirely cybernetic. After getting some feedback, I split the skin in panels and added some indents, marks and barcodes to show the idea that it is a manufactured body. Also, added some wear and tear to the skin.


Also, I did a little bit of work on the metal parts, I added some colour and roughness variation, scratches and edge wear, as well as some painted stripes on the legs. I added some details to her scarf piece and top, just some wear and colour variation. I am still not quite happy with how the materials look at this point but I'll spent the next days refining them more.


This is the progress that I made after one day of working on the textures.

Monday, 14 October 2019

Helmeted Character - Baking

Fifth day of the second week, Friday, I mainly used it get the baking done after I went back and made some slight changes to the unwrap. Initially, I was planning to do the baking in Substance Painter and I had all the meshes prepared with the naming conventions but after having the Marmoset Toolbag baking tutorial I decided to give that a try a instead.
Firstly, I made some test bakes to test out the tools and see how they work, I was happy to get quite good results and see how easy to work with and modify on the go is the baking in Marmoset. After seeing how the baking works, I split my 2 main meshes in 2 different bakers as they have separate texture sheets, and in the bakers I made more baking groups so all the differen t objects that I had would not overlap and cause baking errors. Spent some more time fixing some small issues that I had and then rendered out the normal map, ao map, curvature map and object space normal map.


After I had these maps, I set up the project in Substance Painter and imported the maps there. 
Ready to start the textures. Friday, second week of the project done.


Helmeted Character - Low Poly & Unwrapping

On Monday, the second week of the project I started working on the low poly model. For some of the parts I made the low poly directly in Zbrush, as I had multiple subdivisions and the geometry was clean enough, I used Zremesher to get lower poly counts and adjusted the objects in 3dsMax for the final model. I used this method for most of the accessories, like belts, clips, buttons and for the helmet.
I made the topology for the rest of the character in 3DCoat. I wanted to keep the main body as a single mesh, as the character's outfit is quite skintight. I tried to follow the pieces of clothing when making the low poly, and extruded some parts which had more volume and added some rims where parts of her outfit are overlapping so it would look better when baking. I also tried to have a good edge flow, add control loops and pad the joints, so the model would deform well.


Initially, I finished the low poly in about 11k triangles and because there was still more than half of the budget left I went back and added some more loops and details and smoothed out some rough edges. My initial plan was to complete the low poly using about 20k tris and save 5k tris for the hair cards, but the final model model ended up with about 15k triangles because I decided that there was no point adding more and the test bakes were looking alright. 


I worked on the low poly for about 3 days, the next step was to unwrap it. I split the objects over the 2 texture sheets, trying to keep the same type of material on the same texture sheet. Also, I saved a bit of space on one of the sheets for the hair cards and overlapped the islands that would have the same texture. I tried to keep the UV islands relaxed and at the same relative size and pack them as efficiently as I could, but there were still some spaces left. 


This was the work I completed in the first 4 days of the second week of the project. 


Sunday, 6 October 2019

Helmeted Character - Sculpt Finish

I spent extra time on everything trying to make it look nice and polished. I have tried adding some rough edges and sharp angles on every part of the character to support the idea of her being mechanical and I really wanted to let the brush strokes show even on the final model.


Got some feedback about her back being too exposed and vulnerable so I added a spine armor, which is attached on top on her outfit and the inserts into her back. I decided to add this piece of armor on her back because the spine is the most vulnerable area, but I still wanted to keep her fairly light armored.

Made some small changes on her arms and split the muscle fibers in panels so it would match the torso better.  I tried pushing the robotic look on her but without adding complex mechanical components, just to still keep sort of an organic look overall (my idea for how the body would work was based on the main character from Ghost in the Shell 2017 film).


I've used the Noise generator to add some details to her organic body parts (which would be skin) and then used multiple layers to add pores and skin details to her face. All of the details on her body (panels, cuts, bolts) were made with layers because it took some tries to decide which ones to use.


This concludes the 5th day of working on the character, I would have liked to spent some more time refining the sculpt and add some wear to her outfit and more surface details but I decided that it would be good to move on to the next step in order to finish the project in time. I'll try to compensate with my materials all the details I couldn't put in the sculpt.
I have merged some of my subtools for the export and decimated them, next step is retopology and researching how to do hair cards. 

Helmeted Character - Sculpt 2

Spent some more time refining the forms and adding more details. Also, I've made other pieces of her outfit which were missing. I've decided to stray a little bit from the original concept and add some indication of muscle fibers on her arms, as to push the idea of her being robotic, as well as split her torso in two parts, the upper part being metallic and the lower organic.


Added the last bits of her outfit that were missing, the only things left to make are the buckles for her belts which I am planning to model directly in 3dsMax while I'll be retoping. Also, I've decided not add the belt that went across her chest in the original concept because I think it is not necessary as it was holding the gun at her back which I am not sure I will have time to model, I am focusing on finishing the character first and if I have time left at the end of the project I will model her props.
Spent some more time working on her face and hands, used layers to try out some different ideas, like the connections on the finger joints and panels on her upper torso. I tried making the panels on her torso give an indication of the anatomy so I made them follow her ribcage and muscles. Also, I've added some bolts on the organic part of the torso to make a connection to the robotic part.


This is the stage I achieved after 4 days of working on the character.

Thursday, 3 October 2019

Helmeted Character- Sculpt 1

For my first 3rd year project I chose to do the helmeted character. I spent some time looking for interesting concepts and I picked one made by Kev Chan (https://www.artstation.com/artwork/Ee6vN). I decided on this one because I have never done this type of character before and I think it would allow me to experiment with different materials and shapes. Also, I liked the fact that the concept is not very defined and I could make my own interpretation of the character.

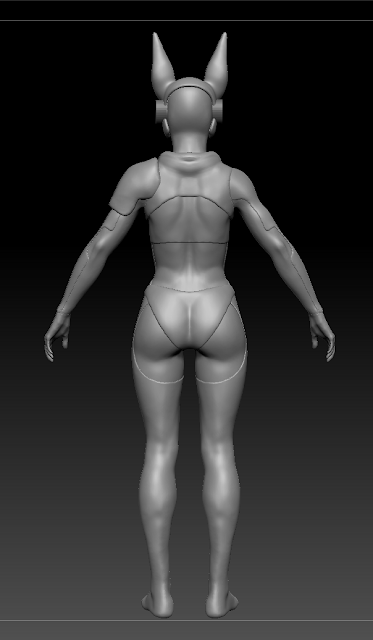
I started directly in Zbrush from a mannequin which I posed and changed the proportions to what I needed, then I started building the anatomy on top of it. Firstly, I loosely sculpted the main shapes and forms and then slowly added more muscle definition and details, I wanted to keep the brush strokes fairly visible to give a rougher look to the sculpt because I want the whole character to be robotic and have most body parts mechanic, with the exception of some organic bits (face, lower abdomen, thighs).
After I had a basic body to work on I made a block out for the main pieces of clothing and armor. I kept everything symmetrical in the beginning because I wanted to get as many things done as I could and broke the symmetry later on in the process. For the clothing, I mainly used Extract and Zremesh.


After this first pass, I went over all the pieces of clothing to add more definition to them and some details. Also, I started adding the smaller accessories to her outfit and helmet. After I had reached a level of definition I was happy with on some body parts, I changed them to be asymmetrical.


This is the progress that I managed to make after 2 days of working on the character, I have different subtools for every piece of clothing, most of them were extracted from the body mesh then Zremeshed to get cleaner topology and I used subdivisions to build up the details. I tried keeping the poly count down for as much as I could and only subdivided when I could not sculpt at that level anymore.